What is Amazon Web Service EC2
EC2 can be said to be the most core service in AWS. Serverless development using Lambda is convenient, but it has limitations. If you build a server at this point, you can do much more. This article will briefly look at what EC2 is, then create an EC2 instance and connect to it with an SSH client. In other words, it's a tutorial on how to build a simple Linux server using AWS.
What is EC2? (Elastic Compute Cloud) #
EC2 is a cloud computing service provided by AWS.
Through this service, you can remotely use the resources of server computers in data centers that Amazon has built around the world. Simply put, you are renting a computer from Amazon. You can access this computer via the URL provided by AWS.
The advantages of EC2 are as follows:
- Elasticity: You can increase or decrease capacity.
- It's inexpensive because you only pay for what you use.
- Users have complete control over their instances.
- Security, network configuration, and storage management are effective.
Step 1: Create an Instance #
- Go to AWS EC2.
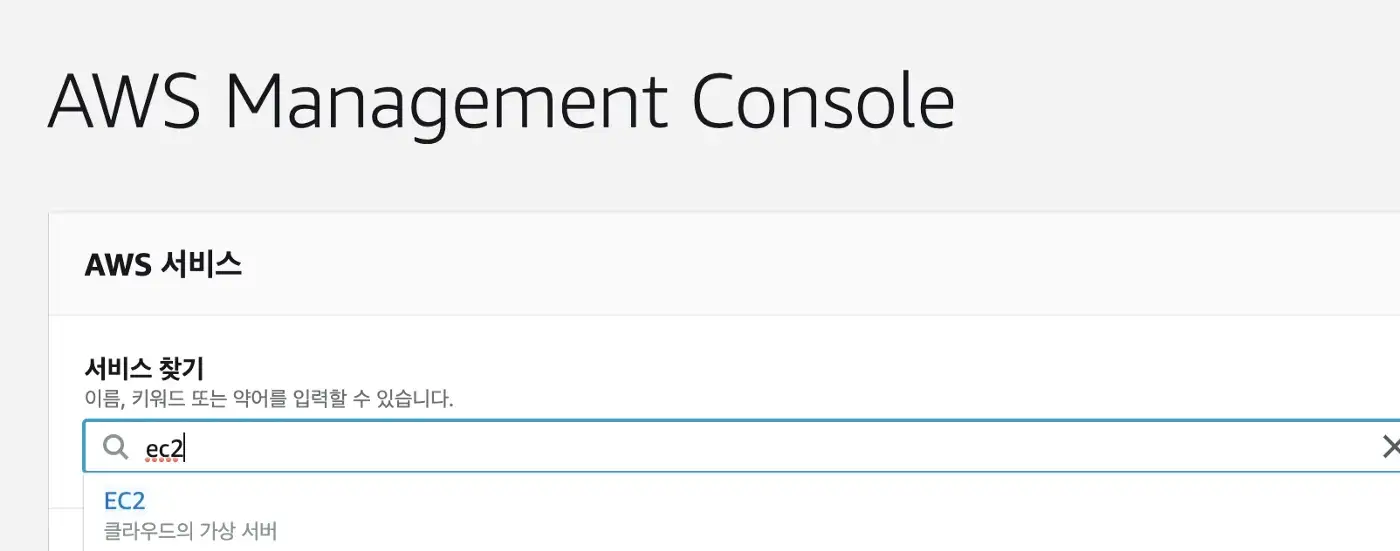
- In the left menu, click Instances > Launch instances.
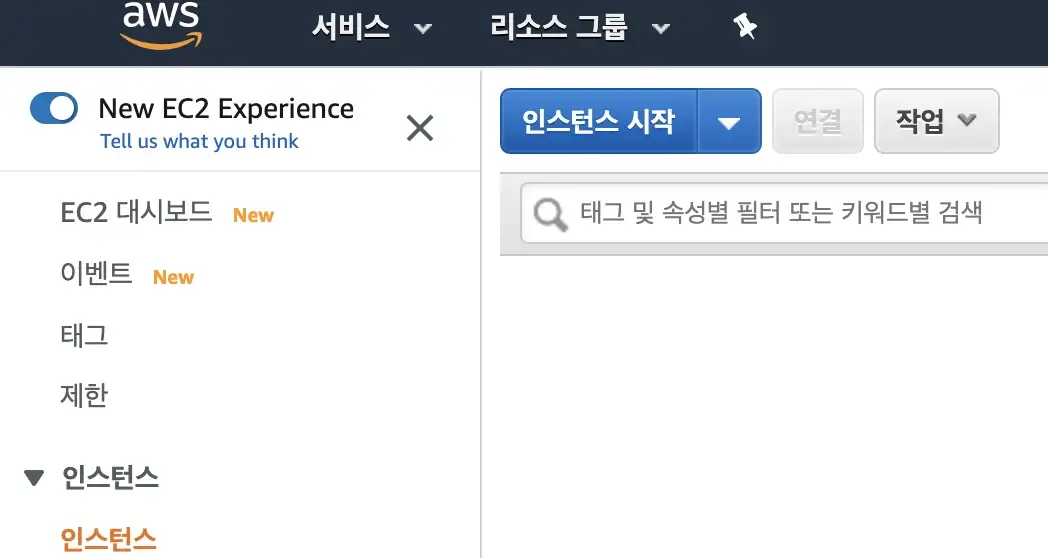
- Instance: A virtual server in the cloud
- Select the desired AMI.
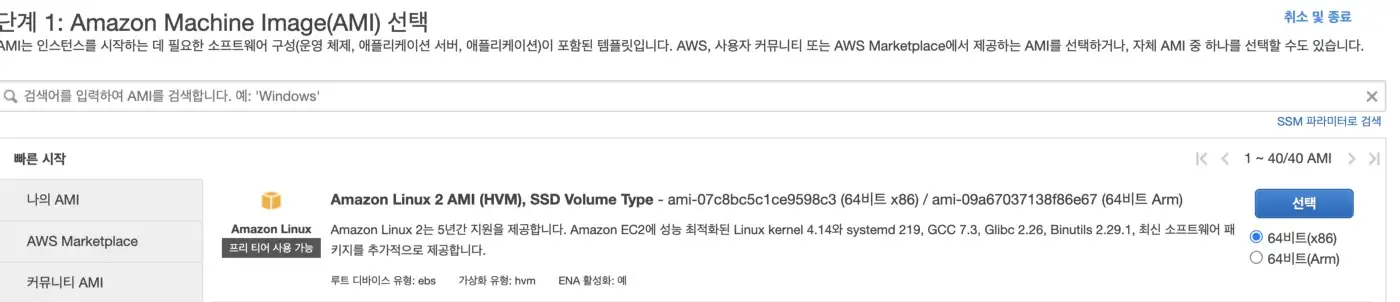
- AMI (Amazon Machine Image): A template with the operating system and various software properly configured for the server.
- Step 1 is to select the operating system. You can choose between Linux and Windows, and in this tutorial, Linux was selected.
- After selecting the instance type, click Review and Launch.
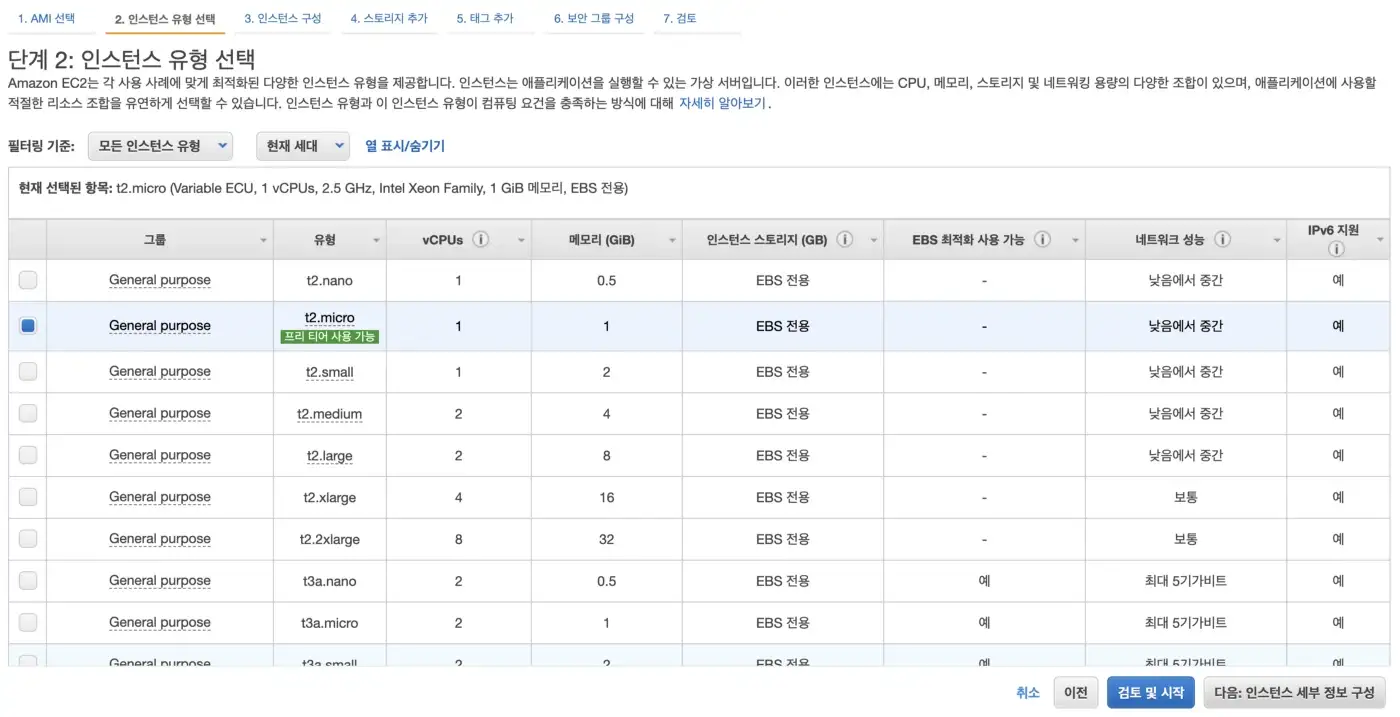
- Step 2 is to select the various configurations for the instance's CPU, memory, storage, and networking capacity as needed.
- While more refined instance settings can be made in the next steps, this article is aimed at readers new to EC2, so steps 3-6 will follow the default values.
- Create a new key pair, download it, and then launch the instance.
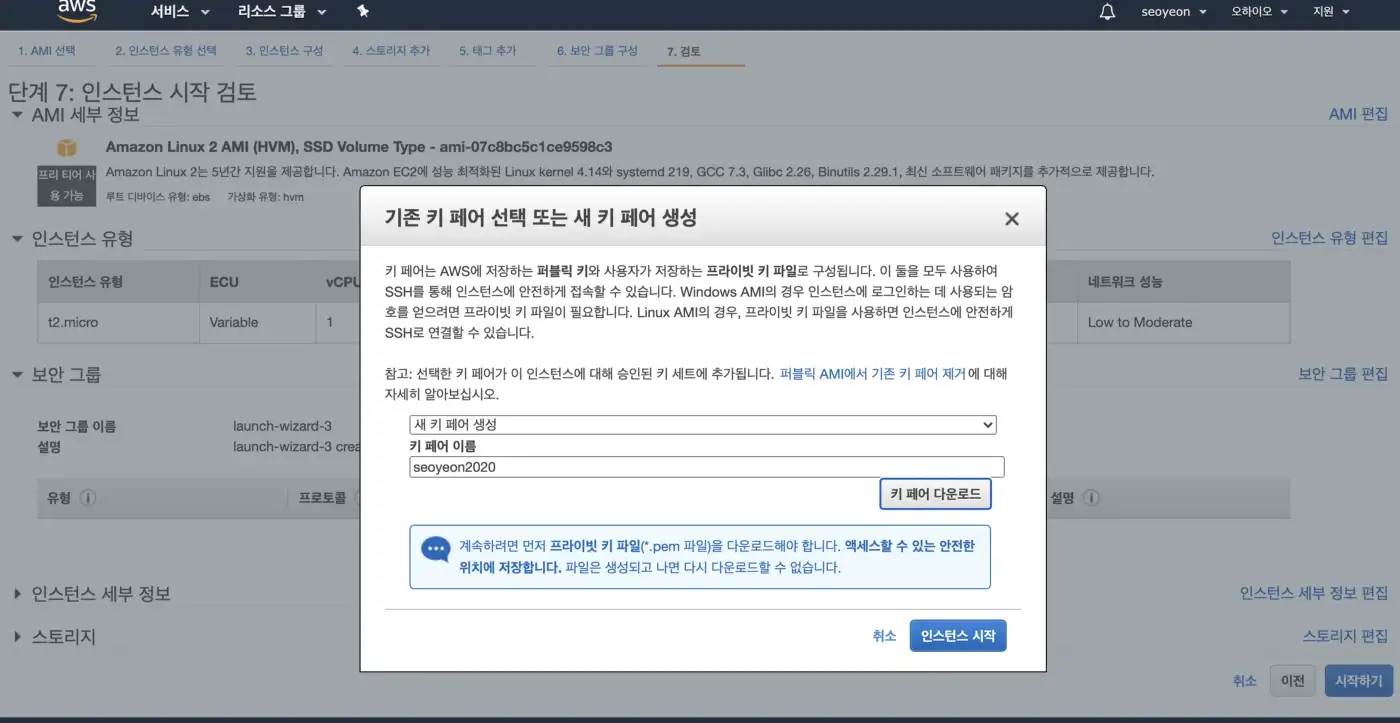
- Key pair: Public key + Private key (.pem)
- You can securely connect to the instance using the saved key pair.
- Anyone who possesses the private key can connect to the instance, so you must store the private key in a secure location.
Step 2: Connect to the Instance #
This is how to connect to a Linux instance using SSH. The local computer's operating system is macOS or Linux.
- Store the private key (.pem) in a secure location, the .ssh subdirectory.
mv ~/Downloads/MyKeyPair.pem ~/.ssh/MyKeyPair.pem
- Set permissions for the private key.
chmod 400 ~/.ssh/MyKeyPair.pem
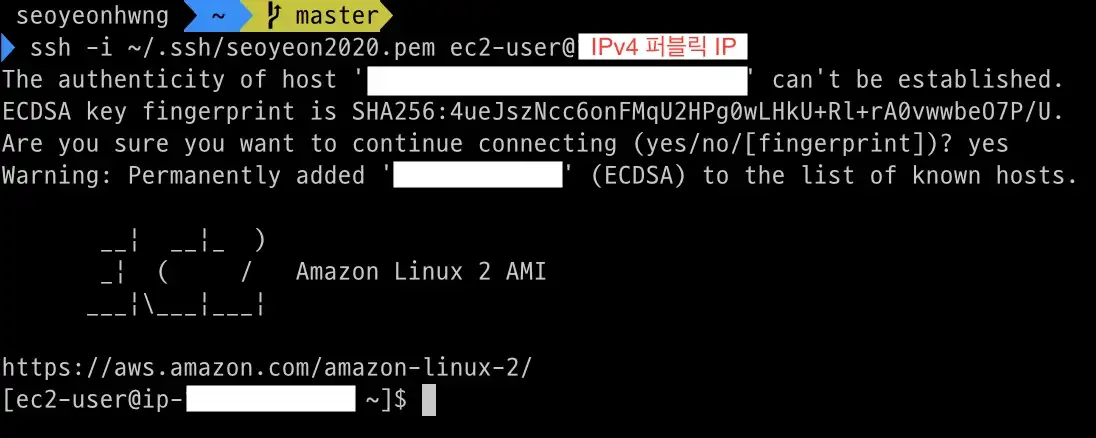
- Connect to the instance using the ssh command.
ssh -i [path to private key (.pem)] [AMI's username]@[instance's public DNS]
Get the default username for the AMI you used to launch the instance.
- For Amazon Linux 2 or Amazon Linux AMI, the username is ec2-user.
- For CentOS AMI, the username is centos.
- For Debian AMI, the username is admin or root.
- For Febora AMI, the username is ec2-user or fedora.
- For RHEL AMI, the username is ec2-user or root.
- For SUSE AMI, the username is ec2-user or root.
- For Ubuntu AMI, the username is ubuntu.
- If ec2-user and root are not available, please contact your AMI provider.
For the instance's public DNS, enter the IPv4 public IP.
Step 3: Easily Connect to the Instance #
Connecting to an instance using its public IP every time is cumbersome. You can easily access the instance by assigning it a name using the method below.
- Open the .ssh/config file.
vim .ssh/config
- Add the following format to the config file.
- Host: Instance name
- HostName: Instance's IPv4 Public IP
- User: AMI's default username
- IdentityFile: Path to the private key
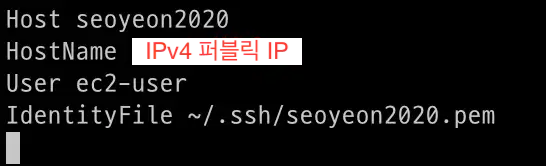
- Now you can connect to the instance using the Host name.
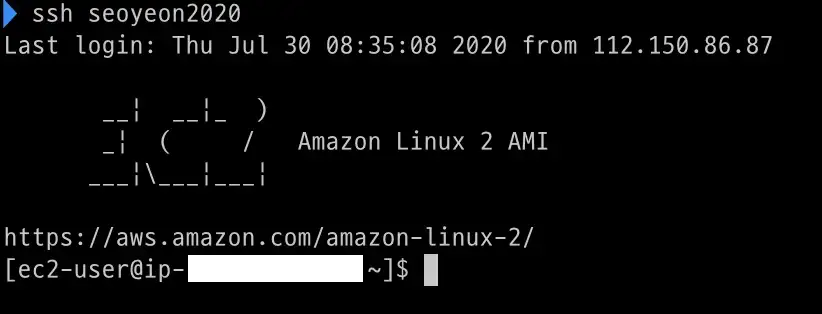
ssh [Host name]