Creating and Deleting NLB and ALB
I will demonstrate how to create ALB and NLB on EKS. This guide assumes that the ALB controller setup, as discussed in the previous post, has been completed.
Creating and Deleting AWS NLB #
To create an AWS NLB using Kubernetes, you need to configure the loadbalancer service's annotations and loadBalancerClass.
Annotations configure AWS NLB options. For more details, please refer to the official user manual.
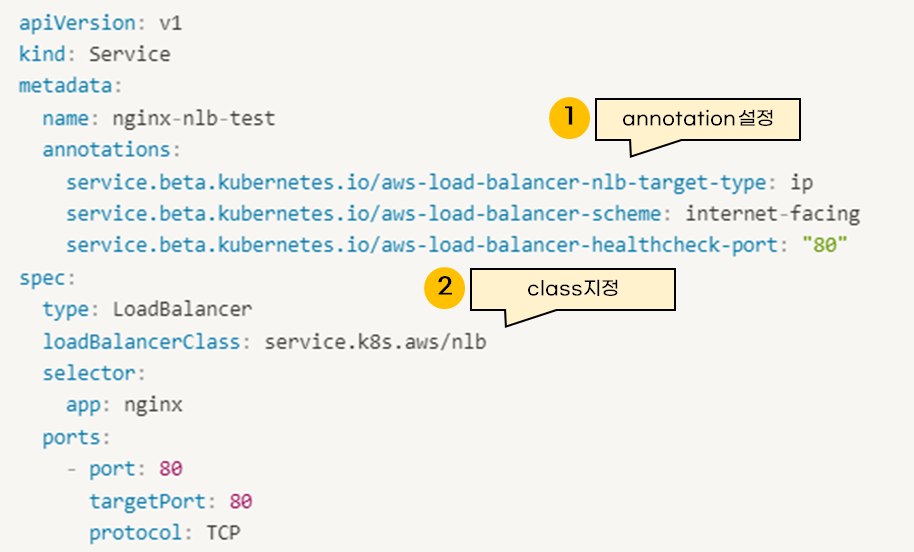
# kubectl apply nlb.yaml
apiVersion: apps/v1
kind: Deployment
metadata:
  name: nginx-nlb-test
spec:
  selector:
    matchLabels:
      app: nginx-nlb-test
  replicas: 1
  template:
    metadata:
      labels:
        app: nginx-nlb-test
    spec:
      containers:
        - name: nginx
          image: nginx:latest
          ports:
            - containerPort: 80
---
apiVersion: v1
kind: Service
metadata:
  name: nginx-nlb-test
  annotations:
    service.beta.kubernetes.io/aws-load-balancer-nlb-target-type: ip
    service.beta.kubernetes.io/aws-load-balancer-scheme: internet-facing
    service.beta.kubernetes.io/aws-load-balancer-healthcheck-port: "80"
spec:
  type: LoadBalancer
  loadBalancerClass: service.k8s.aws/nlb
  selector:
    app: nginx-nlb-test
  ports:
    - port: 80
      targetPort: 80
      protocol: TCP
When you deploy the YAML, a network-type ELB will be created in the AWS console.
It will transition to an active state after about 5 minutes.
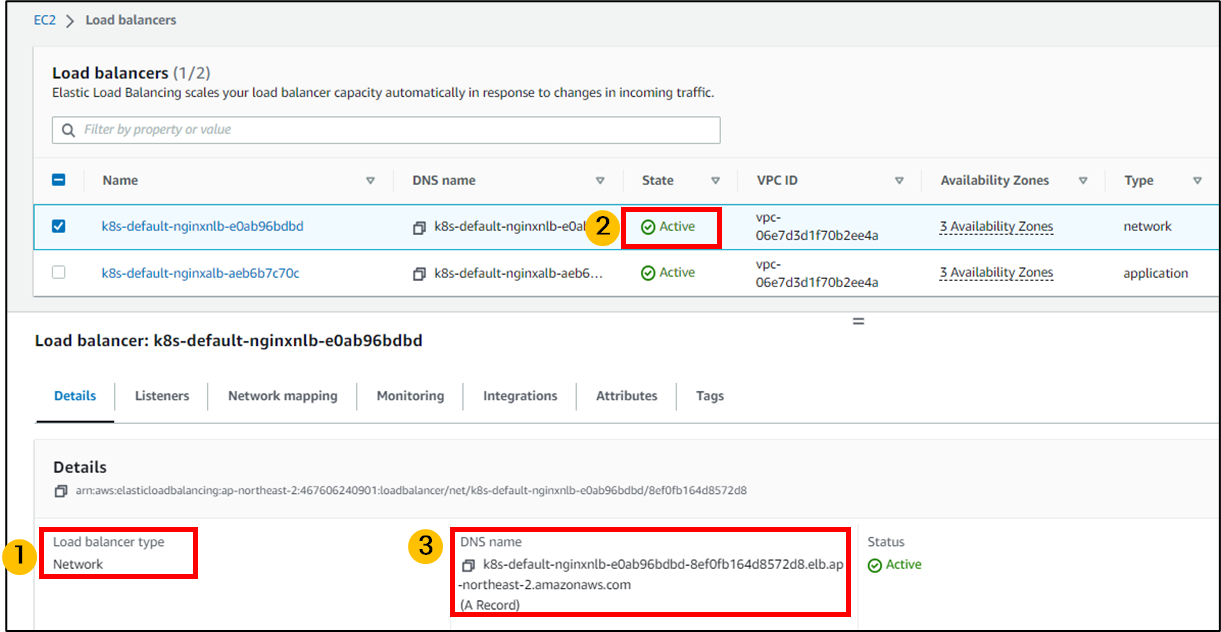
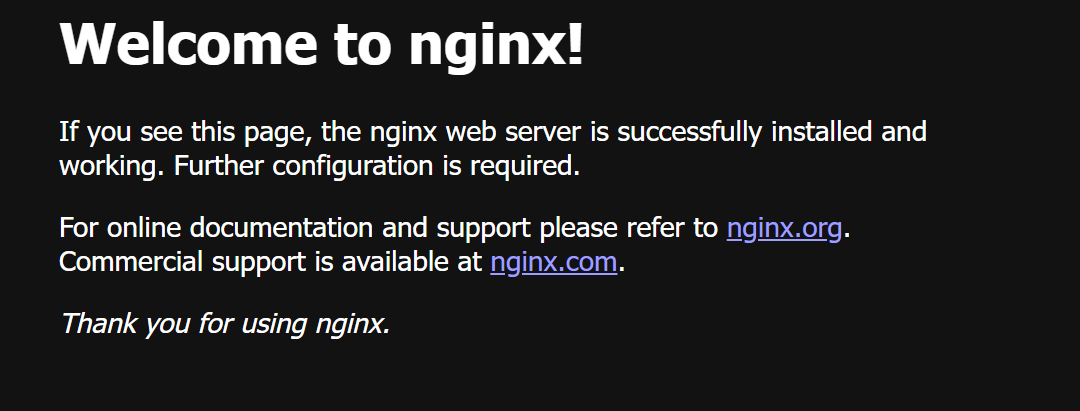
Once it becomes Active, if you access the Network LoadBalancer DNS address in a web browser, you will see the Nginx default page.
kubectl delete -f nlb.yaml
You can delete the AWS NLB you just created with the command above.
Creating and Deleting ALB #
AWS ALB can be created using an Ingress spec.
You need to configure Ingress annotations and ingressClassName.
Annotations are used to configure AWS ALB options.
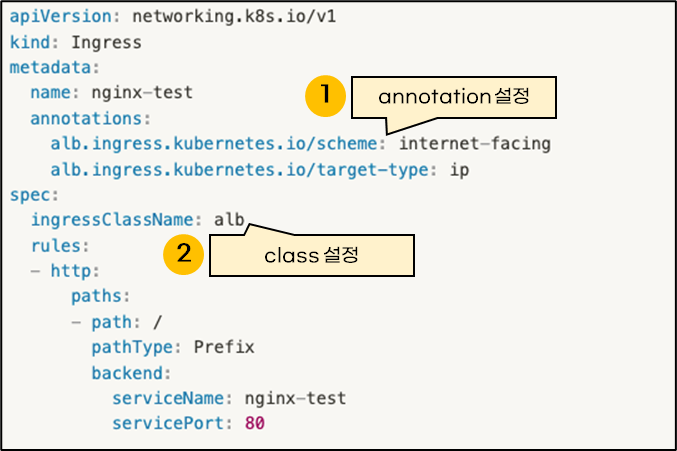
# kubectl apply -f alb.yaml

apiVersion: v1
kind: Pod
metadata:
  name: nginx-alb-test
  labels:
    app: nginx-alb-test
spec:
  containers:
  - name: nginx
    image: nginx
    ports:
    - containerPort: 80
---
apiVersion: v1
kind: Service
metadata:
  name: nginx-alb-test
spec:
  selector:
    app: nginx-alb-test
  ports:
  - name: http
    port: 80
    targetPort: 80
  type: ClusterIP
---
apiVersion: networking.k8s.io/v1
kind: Ingress
metadata:
  name: nginx-alb-test
  annotations:
    alb.ingress.kubernetes.io/scheme: internet-facing
    alb.ingress.kubernetes.io/target-type: ip
spec:
  ingressClassName: alb
  rules:
  - http:
      paths:
      - path: /
        pathType: Prefix
        backend:
          service:
            name: nginx-alb-test
            port:
              number: 80
When you deploy the above manifest with kubectl apply,
an Application-type ELB will be created in the AWS console, and it will also transition to an active state after 5 minutes.
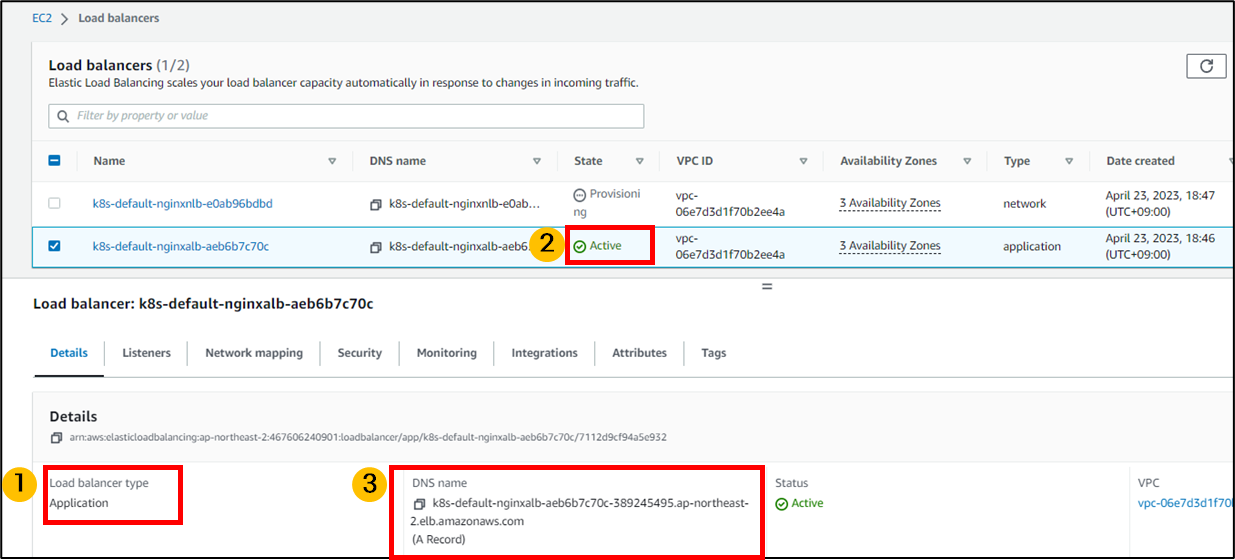
Similarly, if you access the ALB DNS address, you will see the Nginx default browser page, and you can delete it using kubectl delete -f alb.yaml.