Container Resource Limits
Container Resource Allocation Limits #
You can specify options to adjust the resource allocation for a container when using the run or create commands to create it.
If no options are specified, the container can use the host's resources without limits.
However, if a container uses all resources, it will not only affect the host but also other containers.
Checking Resource Limits #
To check the resource limits set for the current container, use docker inspect.
$ docker inspect container_name(id)
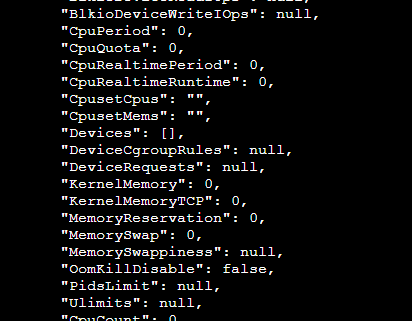
docker inspect output showing memory-related information.
Memory Resource Limits #
You can limit a container's memory using --memory with the docker run command.
Executing the command below will create a container with 1g of memory.
$ docker run -d --memory="1g" --name memory_1g nginx
Let's check if it's properly limited.
$ docker inspect memory_1g | grep "Memory"
If the allocated memory is exceeded, the container will automatically terminate, so it's best to allocate memory appropriately depending on the application.
CPU Limits #
--cpu-shares
This option allows you to set a weight for a container, determining how much CPU it can relatively use.
It does not allocate a specific number of CPU cores but rather specifies what proportion of the system's available CPU resources the container can share.
$ docker run -it --name cpu_1024 --cpu-shares 1024 ubuntu:18.04
To test this, search for and run stress inside the created container as shown below.
If you specify 1 core, that core will be exactly 100% utilized.
$ apt-get update
$ apt-get install stress
$ stress --cpu <number_of_cores>
You can check this on the host. Currently, since there's only one container created, you can see it consuming almost 100%.
$ ps aux | grep stress

ps aux output showing stress process consuming CPU.
For testing, let's create another container allocated 512 shares and apply stress to it.
$ docker run -it --name cpu_512 --cpu-shares 512 ubuntu:18.04
As a result, you can see that the CPU is being shared in a 1:2 ratio.

ps aux output showing two stress processes consuming CPU in a 1:2 ratio.
--cpuset-cpu
When a host has multiple CPUs, the --cpuset-cpus option can be used to configure a container to use only specific CPUs.
I can't test this because my AWS EC2 instance only has one CPU.
By the way, you can use the htop tool to monitor CPU and memory usage.

htop output showing CPU and memory usage.
--cpu-period, --cpu-quota
cpu-period is typically allocated 100ms per container, but it can be changed via --cpu-period.
And --cpu-quota determines how much CPU will be allocated during the assigned 100ms.
$ docker run -d --name quota_1_4 --cpu-period=100000 --cpu-quota=25000 ubuntu:18.04
A container created as above will have its CPU performance reduced to 1/4 because it has been reduced from the original 100000 to 25000.
In other words, a container is allocated CPU time based on the cpu-quota / cpu-period value.
--cpus
--cpus provides the same functionality as --cpu-quota and --cpu-period but allows for a more intuitive direct specification of the number of CPUs.
For example, 0.5 means setting the ratio of cpu-quota to cpu-period to 0.5. So, it's equivalent to 50000 (quota) / 100000 (period).
Block I/O Limits #
When creating a container without any options, there are no restrictions on the bandwidth for reading and writing files internally.
To prevent a single container from monopolizing too much I/O, you can limit block I/O using the --device-write-bps, --device-read-bps, --device-write-iops, and --device-read-iops options. Note that I/O is only limited for Direct I/O; Buffered I/O is not limited.